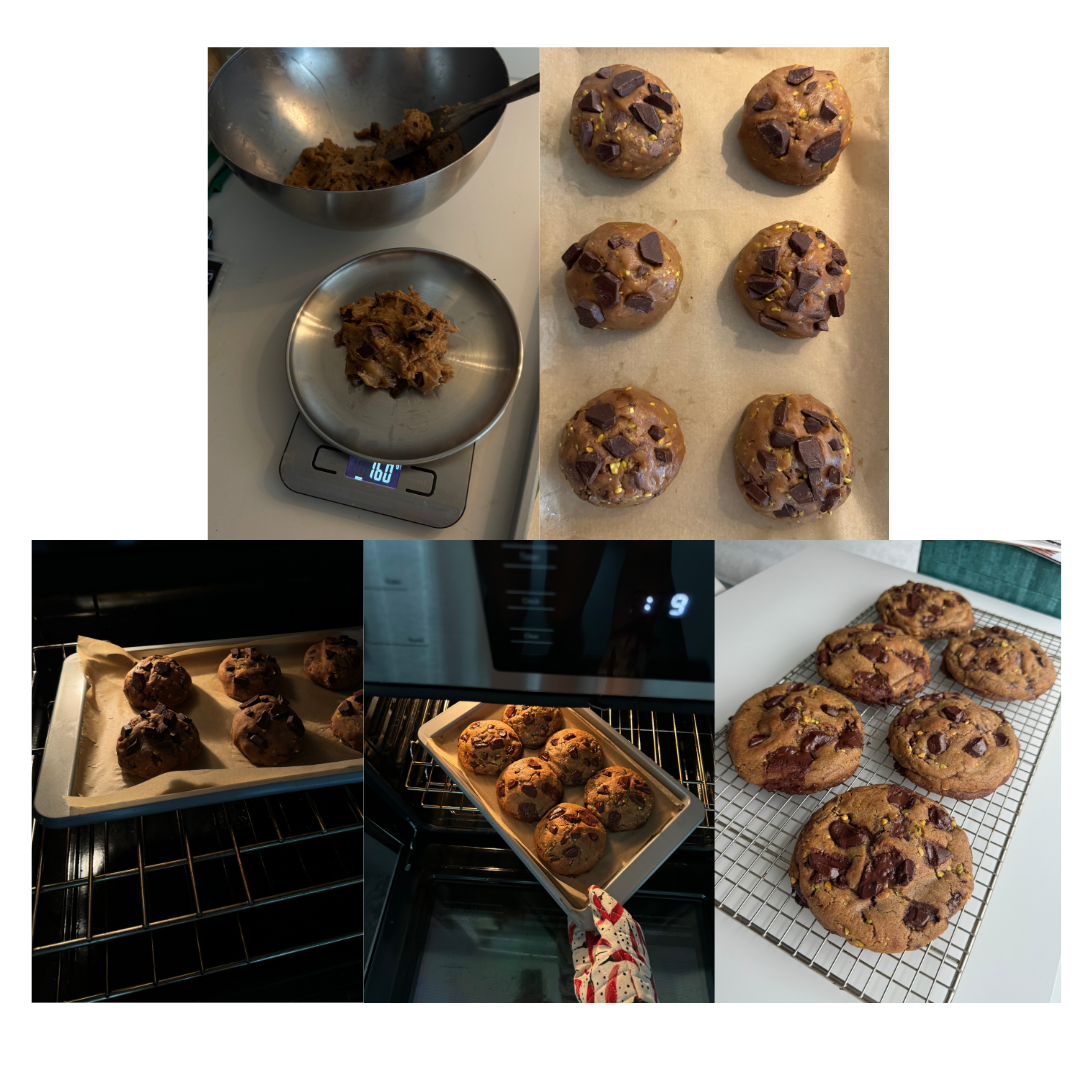
This is the cookie base recipe I use for most of the cookies I make. I also included some tips from the knowledge I’ve gained based on my experience. Hope this helps!!!
Ingredients:
1c (227gr) unsalted butter
1tbsp milk powder (can skip, but adds extra flavour)
1c (220gr) light brown sugar
⅓c (67gr) granulated sugar
1 large room-temp egg + 2 egg yolks
2c (240gr) all-purpose flour
1tsp baking soda
1tsp corn starch
salt
bitter-sweet chocolate*
Step-by-Step
Melt your butter on medium heat, add milk powder, mix, cook until browned, and turn off the heat. Transfer to the bowl you’ll be using to make the cookie dough (fewer dishes!) and allow to cool
Roughly chop your chocolate of choice, set some aside for finishing
To the bowl with butter, add brown sugar and granulated sugar, and whisk until just combined
Add eggs and whisk until a little bit frothy and smooth
Add dry ingredients in, and fold using a spatula until just combined
Add in the chocolate, and mix until everything is combined
after this step, you have to decide if you want:
Thicker gooey cookies
Thinner crispy cookies
Weigh the cookie dough (it’ll be different each time, depending on how much/heavy the chocolate you use), form cookie dough balls, and top on with the chocolate chunks (set aside earlier) to make them pretty
My usual measurement:
total weight/6 cookies ≈ 6oz ~ 170gr each
total weight/12 cookies ≈ 3oz ~ 85gr each
Resting:
Longer rest: cover and refrigerate, the longer the taller the cookie will be. I’ll do a minimal 1 hour.
Less rest: let rest for 10-15 minutes to allow the gluten to chill after all that tiring work. But if you have zero patience = skip (not recommended)
Bake**
In a preheated oven 400F ~ 200C, bake for 12-15 minutes
In a preheated oven 350F ~ 180C, bake for 10 minutes
no resting time = 8-10 minutes
Take them out from the oven, if they stick to each other or if you have ugly cookie shapes, this is the perfect time to reshape them before cooling. Use a mug, a cookie cutter, or anything circular and wiggle your cookies (search online: hack for perfectly round cookies)
Transfer to a cooling rack*** to allow to cool. PLZ don’t skip. This is crucial for non-soggy, crispy-edge, gooey centre cookies. Treat them with care, they’re still fragile
Notes/Tips:
*I never measure how much chocolate I put in, it depends on what brand/flavor profile I use. Sweeter = less amount and vice versa. But if you want quantity still… I usually do ~1.5c 58% bitter-sweet couverture chocolate.
If you can, use couverture chocolate/chocolate bars instead of chocolate chips. They have higher cocoa butter content = more intense chocolate flavour and smoother, meltier cookies. Chocolate chips oftentimes have unknown fats and stabilizers = they hold their shape too well = harder to melt (ngl they also look uglier, have smaller surface area = smaller chocolate bites, etc)
**baking time: honestly, different ovens vary in temperature. I recommend checking your cookies in the oven several times while baking to see if they’re done = brown edges with a slightly underbaked, soft centre. Don’t worry! Remember they are still cooking for a couple of minutes after you take them out of the oven. They’ll harden once cooled down
***if you don’t have a cooling rack, use anything with ventilation underneath such as a flat strainer
If you want to add more toppings such as nuts, do it on step 6. Just beware that your cookie weight is going to be heavier.
If you want to stuff your cookies such as hazelnut/peanut/pistachio butter, etc: use recipe a) please.
Scoop the filling around 1 tbsp each and let chill in the freezer until the surface hardened. Include them when forming cookie dough balls on (7).
If you want to make a chocolate cookie base, change around 2 tbsp of your AP flour to cocoa powder (this does not work on mild cookie flavours such as matcha, it’s going to be a different recipe)
Chilling the dough prevents the cookies from over-spreading and burning
Don’t over-mix the cookie dough, excess air in the dough will make the cookies collapse easily in the oven
Some prefer resting (8) before portioning (7) because if you haven’t rested the dough, it will still be a bit wet and the chocolate is going to melt on your hand temperature while forming the balls. However, I found that it would consume me more time to chill before forming balls as the dough would be harder to work with when it’s well-rested. So I prefer to get my hands dirty beforehand. This is preference though, both ways work.
Sometimes you have too many cookies and don’t want to bake/eat them all in one sitting. It’s always nice to prep cookie dough and bake for when you crave for one.
Freezing cookie dough: After chilling the cookie dough balls separately, put them in a freezer-friendly bag/container. No need to thaw before baking, follow a) and just add an extra minute/two baking time
It takes time to perfect your cookies. Don’t worry if you fail, just try again! The more attempts, the more feeling and knowledge you get. It took me years to perfect my cookies too :)


